
As a universal symbol of sophistication and professionalism, the tie is an integral component of formal attire. Tying a tie, specifically a Full Windsor knot, is an art that requires finesse and practice. Our guide, accompanied by the video “How to Tie a Tie (Mirrored / Slowly) – Full Windsor Knot,” is designed to break down this process into manageable steps. The video is a comprehensive 5-minute demonstration at a slow pace, allowing viewers to follow along easily. It provides detailed instructions for tying a Full Windsor knot, highlighting vital aspects like adjusting the tie’s length, holding the knot, and maneuvering the tie around the tie hole.
How to Tie a Tie:
- Preparation: Place the tie around your neck, with the seam side down. The fat end should be lower than the skinny end, which should be around your rib cage level.
- Crossing the Ends: Cross the fat end over the skinny end, forming an ‘X.’ The hand holding the ‘X’ is the “knot hand.”
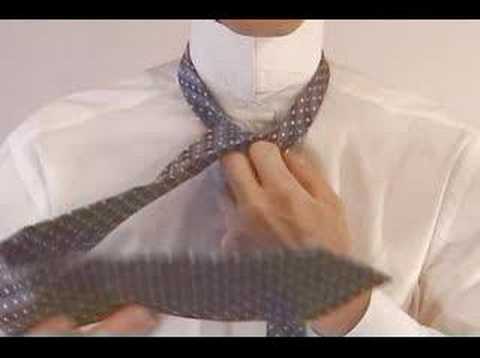
- Creating the Tie Hole: The space between the ‘X’ and your neck is the “tie hole.” The tie will go in and out of this hole in the following steps.
- Out of the Hole: Push the fat end up and out of the hole.
- Behind the Hole: Move the fat end to the side and push it straight through behind the hole.
- Into the Hole: Flip the fat end around and push it through the hole from the front.
- Across the Hole: Move the fat end to the side and then make it go across the hole.
- Out of the Hole Again: Flip the fat end to make it go out of the hole, keeping the face showing.
- Finishing Up: Take the fat end of the tie and put it behind the across step. Pull it through and tighten the knot. Adjust the tie to your liking by pulling and sliding the knot.
- Final Touches: Flip your collar down, button your shirt, and give your tie one final tighten.